Exporting and importing an ontology
The Export/Import function is used when you want to reuse an existing ontology (either on the same or a different server).
Note:
If you attempt to re-import or re-export an ontology, a duplicate ontology will get created with the current timestamp appended to the filename.
The configuration of OCR engines appears disabled after import. The configuration needs to be enabled manually.
Any difference in the imported ontology from previous and current version of TruCap+ will get highlighted to the user. A column in the imported ontology identifies which version the imported ontology belongs.
Exporting ontology
Note:
If an ML-based Extraction Technique is selected for an ontology, it is linked to a document class and will have ML tags associated with the field. While exporting and importing an ontology, the document class is not considered, as while importing an ontology, for another instance, the document class would not be available. Hence while exporting and importing, ML tags will not populate.
To export an ontology, follow these steps:
-
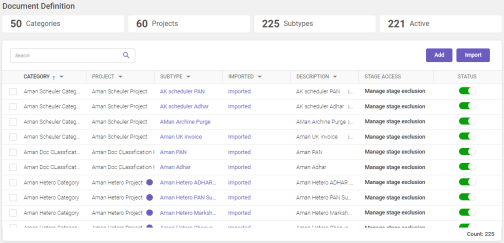
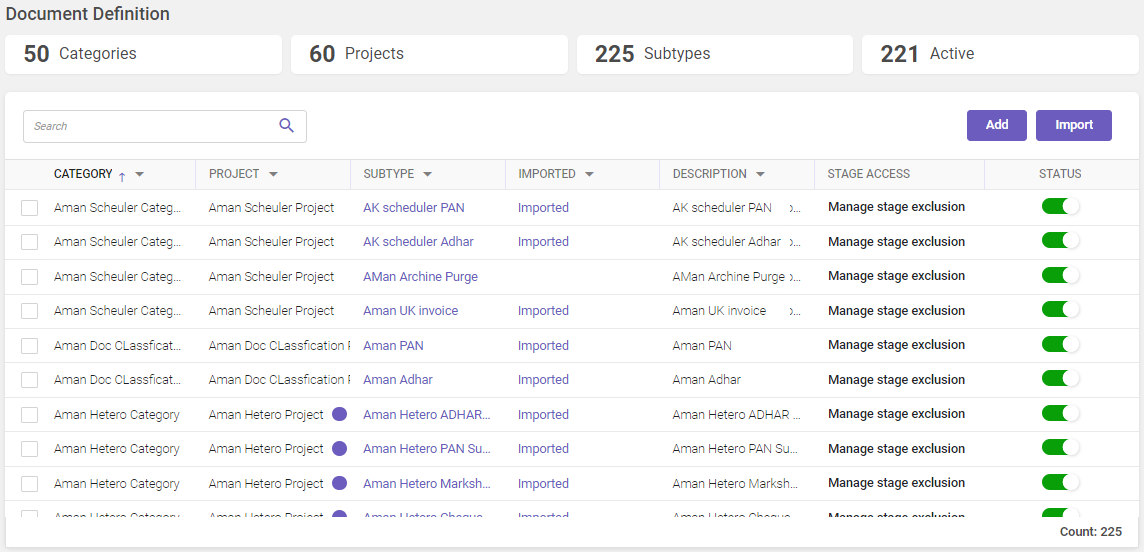
In the main menu, under Document Definition, click Subtype / Ontology. The Document Definition page opens.
-
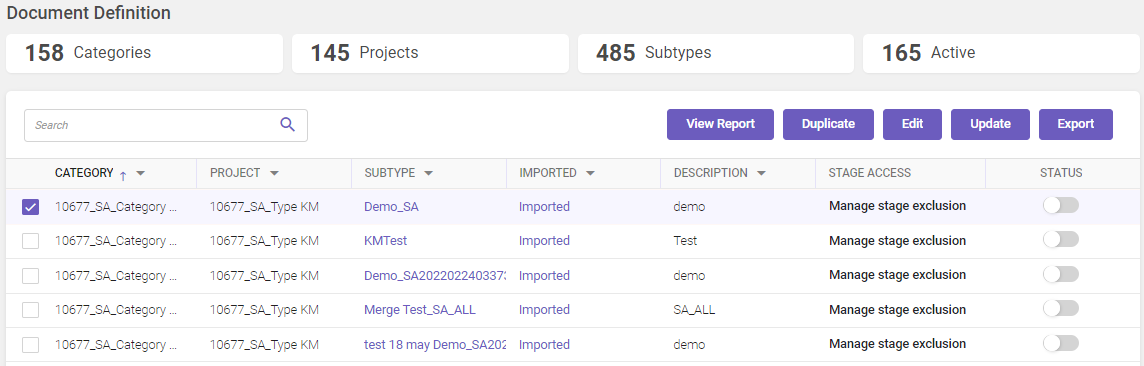
On the Category column, select the required subtype ontology that is to be exported.
-
On the top-right corner of the page, click Export. The ontology is saved at the required location in ZIP format. This downloaded ontology can be used to import it to another server or update the existing ontology after modifications.
Updating ontology
Using the update feature, a user can update an existing ontology in two ways:
-
Export the ontology of the subtype to be updated, make the necessary changes and then update the existing ontology using the update feature.
-
Create a new ontology and then, using the update feature, update the existing ontology for the subtype whose ontology must be updated.
To update an ontology, follow these steps:
-
In the main menu, under Document Definition, click Subtype / Ontology. The Document Definition page opens.
-
On the Category column, select the required subtype ontology that is to be updated.
-
On the top-right corner of the page, click Update and browse to select the required file that is to be used to update the existing ontology. The Review Ontology window opens.

Refer the table below to read the callout descriptions.
#
DESCRIPTION
1
Displays the three types of field toggle switch available as follows:
-
Unchanged Field: If all the existing and updated field parameters are the same, it is termed as unchanged field. Displayed in Blue color.
-
Modified Field: If any of the field parameter is changed, it is termed as modified field. Displayed in Green color.
-
New Field: If any new fields are added in the updated ontology, it is termed as a new field. Displayed in Maroon color.
Note
By default all the three toggle switches are enabled. A user can enable/disable the required toggle switch to review the fields of his choice.
2
Displays the name of the existing and the updated ontology respectively.
3
Displays the respective sections namely Header, Table (labeled as Detail), and Footer.
Expand the Header or Footer section to view the list of available fields. Whereas the Detail section will have the list of tables, click on the table name to view the list of available fields.
4
Displays the comparative details about the changes done to the ontology in the form of existing and updated values. It comprises of three tabs Properties, Synonyms, and Methods.
When you click on any field available under the header, detail, or footer section, it displays all types of changes done (if any) for that field related to field properties, synonyms, or extraction rules.
-
-
Click Save to successfully update the ontology fields.

Note:
-
If the existing field name is changed or modified, it will be considered as a new field. The old field will remain enabled.
-
If a user updates the ROI on the exported ontology and then merges it, the updated ROI will override the original.
-
If a new document is uploaded to the exported ontology and then merged, the newly uploaded document will be visible in the ontology after the merge. The ROI and document will override the existing.
-
The review screen shows all the rule statements except the exact match. Changes to the existing rule statement parameters are displayed on the review screen as existing value and updated value.
-
Any modifications to the existing field or the field type in the original ontology will be visible on the review screen.
-
Under the Synonyms tab, if the updated synonym is present in the existing synonyms list, it is displayed in Green; if not, it is displayed in Red.
Importing ontology
Note:
-
If an ML-based Extraction Technique is selected for an ontology, it is linked to a document class and will have ML tags associated with the field. While exporting and importing an ontology, the document class is not considered, as while importing an ontology, for another instance, the document class would not be available. Hence while exporting and importing, ML tags will not populate.
-
While importing the ontology, the users specified under the "Bypass QC for Below User" field on the Parameters tab while adding a subtype will not be imported.
-
A user must select the required document class after import, as the Document Class field is left blank once you import an ontology.
To import an ontology, follow these steps:
-
In the main menu, under Document Definition, click Subtype / Ontology. The Document Definition page opens.
-
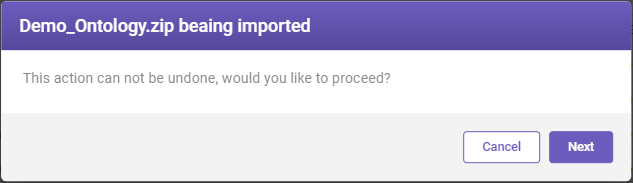
On the top-right corner of the page, click Import and browse to select the required file that is to be imported. Once you select the file, an ontology being imported warning message window appears. Click Next to proceed importing the ontology, or else click Cancel to terminate importing of ontology.

-
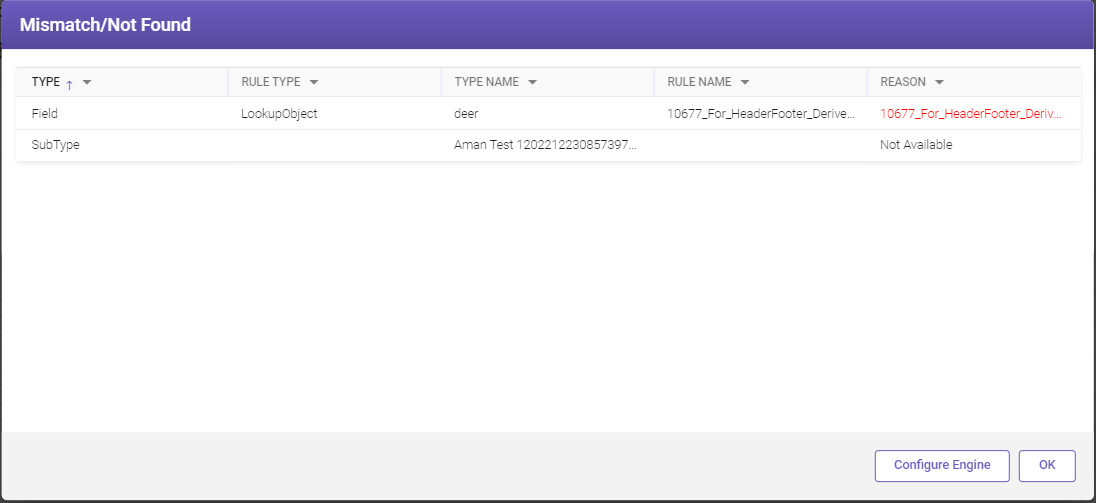
Once you click Next, the Mismatch/Not Found window opens.

-
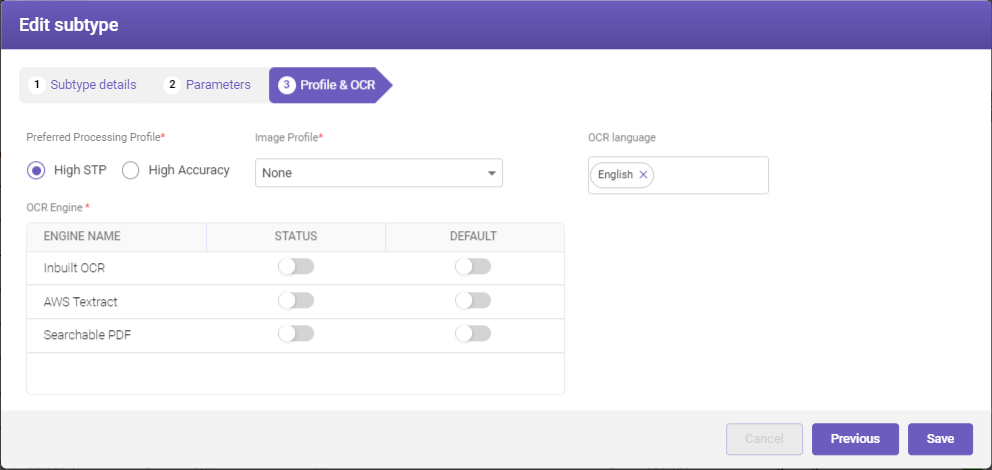
If you want to configure an OCR engine, click Configure Engine. The Edit subtype > Profile & OCR tab opens.

-
Enable the required OCR engine from the available list and click Save.